

Calendar
Week and day views, creating events by drag and drop or in plain language, seeing deadlines and importing or exporting calendars.
Open in ClapilotThe calendar shows your appointments and deadlines. It is personal: your team can't see it. Events are created by hand, from emails, from documents and by the agent; connected calendars from Microsoft 365, Google or Apple iCloud appear automatically.
The week view
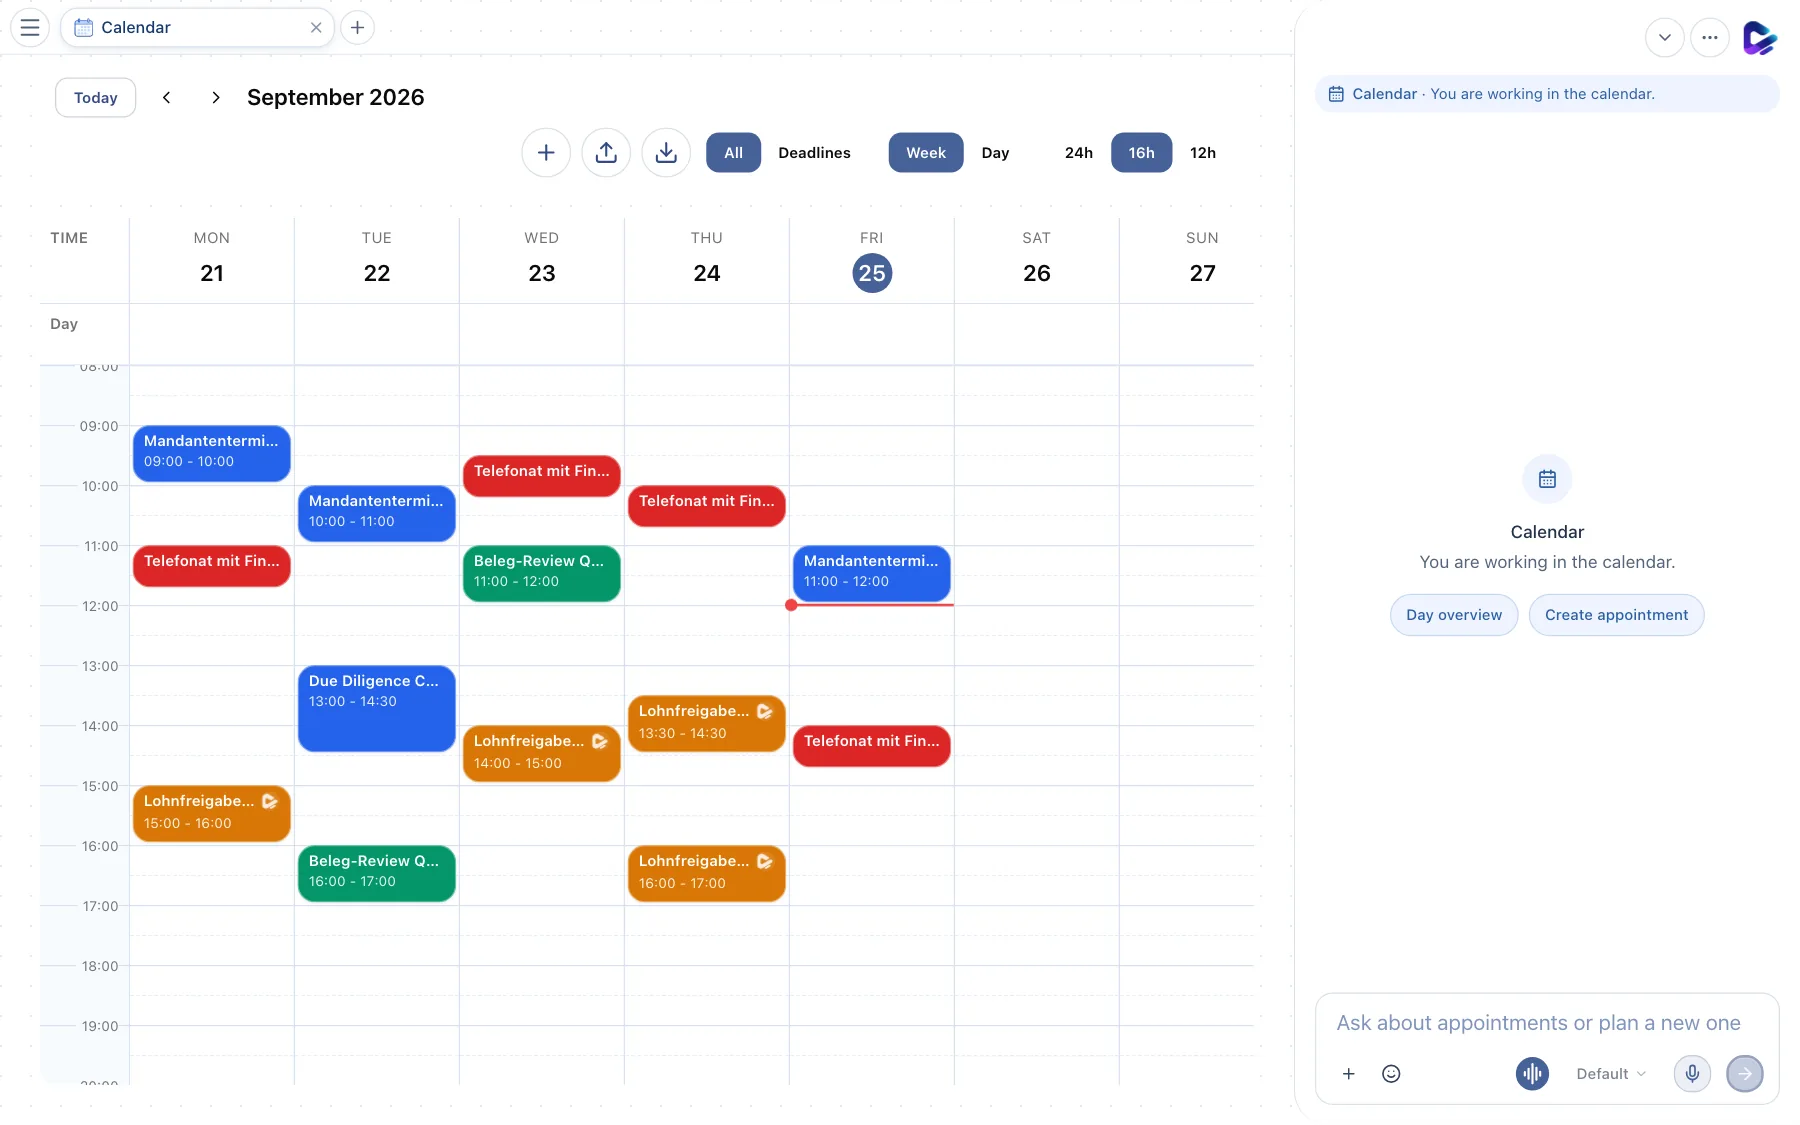
- Today – jumps to the current week or to today.
- Previous and next – moves one week or one day back or forward.
- Create entry – opens the form for a new event.
- Import iCal – imports events from an .ics file, an iCal URL or pasted iCal text. The icon next to it exports the visible range as iCal.
- All / Deadlines – shows all entries or only deadlines.
- Week / Day – switches the view.
- Zoom – 24h, 16h or 12h sets how many hours are visible at once.
- Event – click it to open the details.
The red line marks the current time. All-day entries appear in the Day row above the hours.
Working with the mouse: Drag across an empty area to create an event for exactly that time span. Drag an event to move it, or drag its bottom edge to change its length.
Creating an event
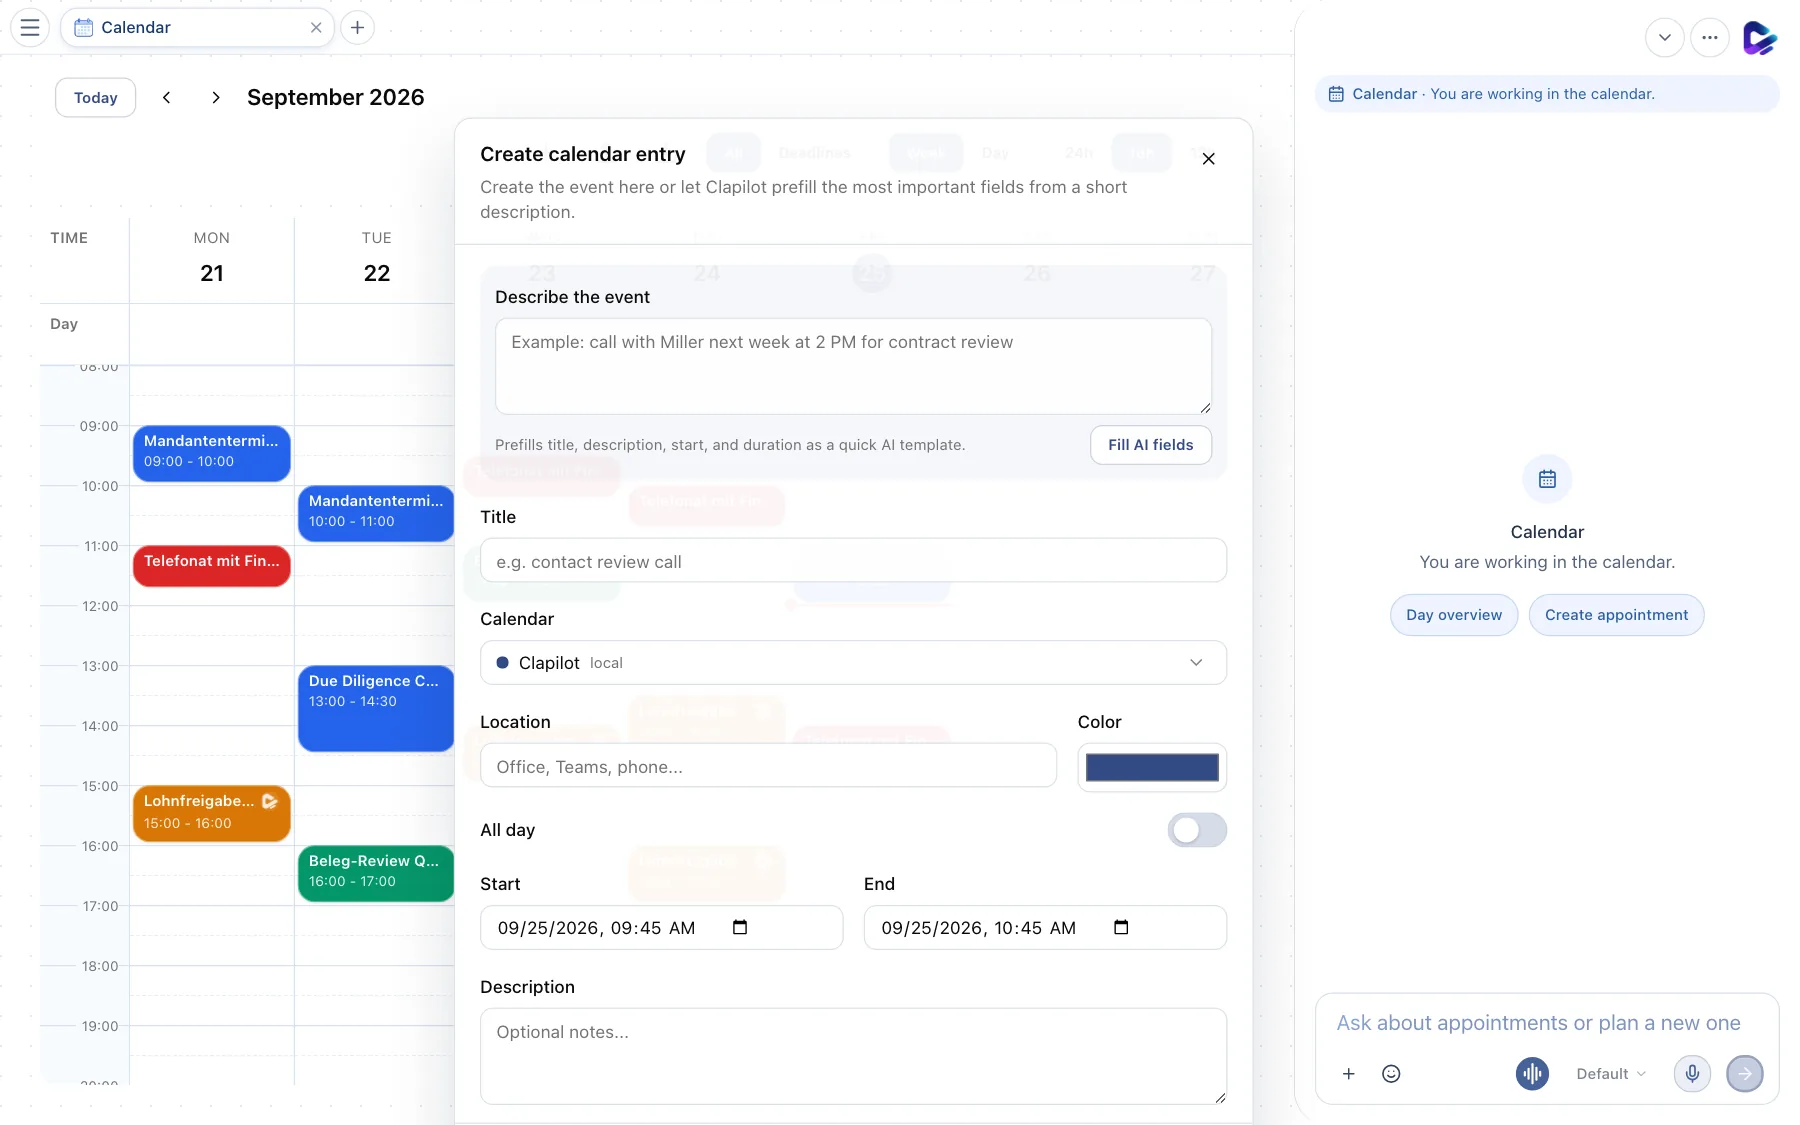
- Describe the event – write in plain language, for example “Call with Miller next week at 2 PM for contract review”.
- Fill AI fields – Clapilot uses your description to fill in the title, description, start and duration. Check and complete the fields afterwards.
- Title – the name of the event. Below it, you choose the Calendar, the Location and a Color; All day turns it into an all-day event.
- Start and End – date and time. Add more details under Description.
Event details
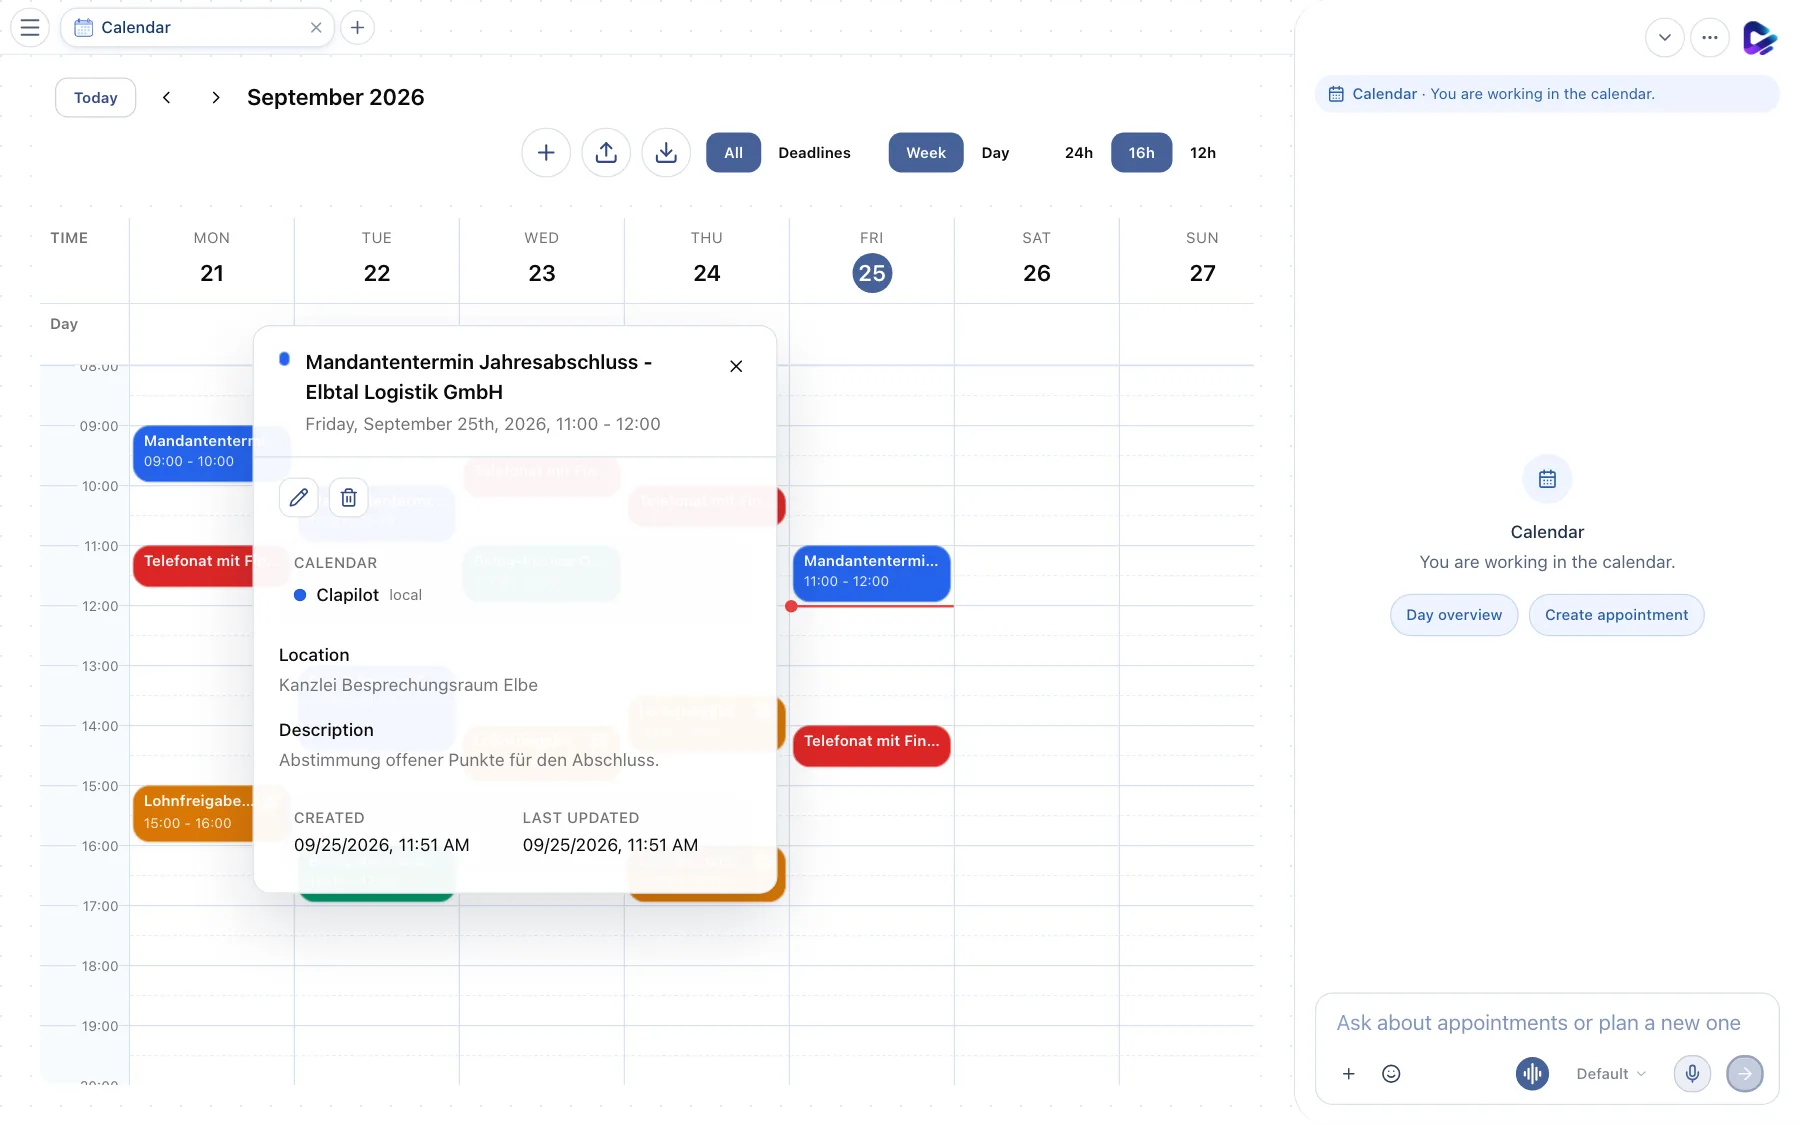
- Title and time – along with the calendar, location, description and when the event was created or changed.
- Edit event – opens the form.
- Delete event – removes the event.
- Close – or press Esc.
If an event was created from an email or a document, the details show the Source and the linked Contact. For deadlines, you also see a countdown and steps such as Show preparation, Send reply, Open task or Open contact.
Connecting and subscribing to calendars
- Microsoft 365, Google Workspace, Apple iCloud: via Settings → App Connections. The events appear automatically in your Clapilot calendar.
- iCal subscription: under Settings → Modules → Calendar, add an iCal URL – for example public holidays or a team calendar – and set how often it is refreshed.
What you can ask the agent
- “Block tomorrow from 2 to 3 PM for the receipt review.”
- “Which deadlines expire this week?”
- “Move the appointment with Elbtal Logistik to Thursday, same time.”
- “Find a free one-hour slot next week in the morning.”